Classic Editor
Adding New Image/Picture/Media
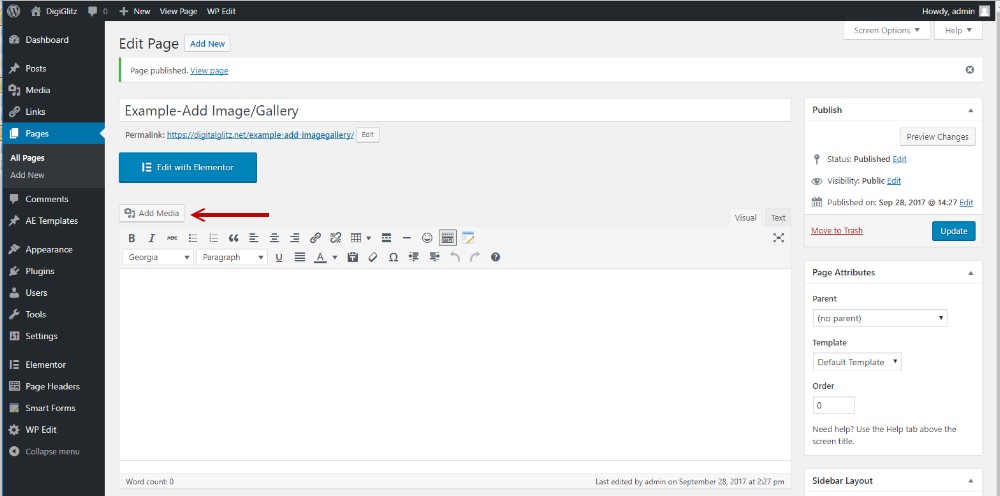
- Open (edit) the page you wish to Add, Change or Remove a picture (media) from.
- Select area on page you wish Media/Gallery to be placed.
- Click on Add Media button
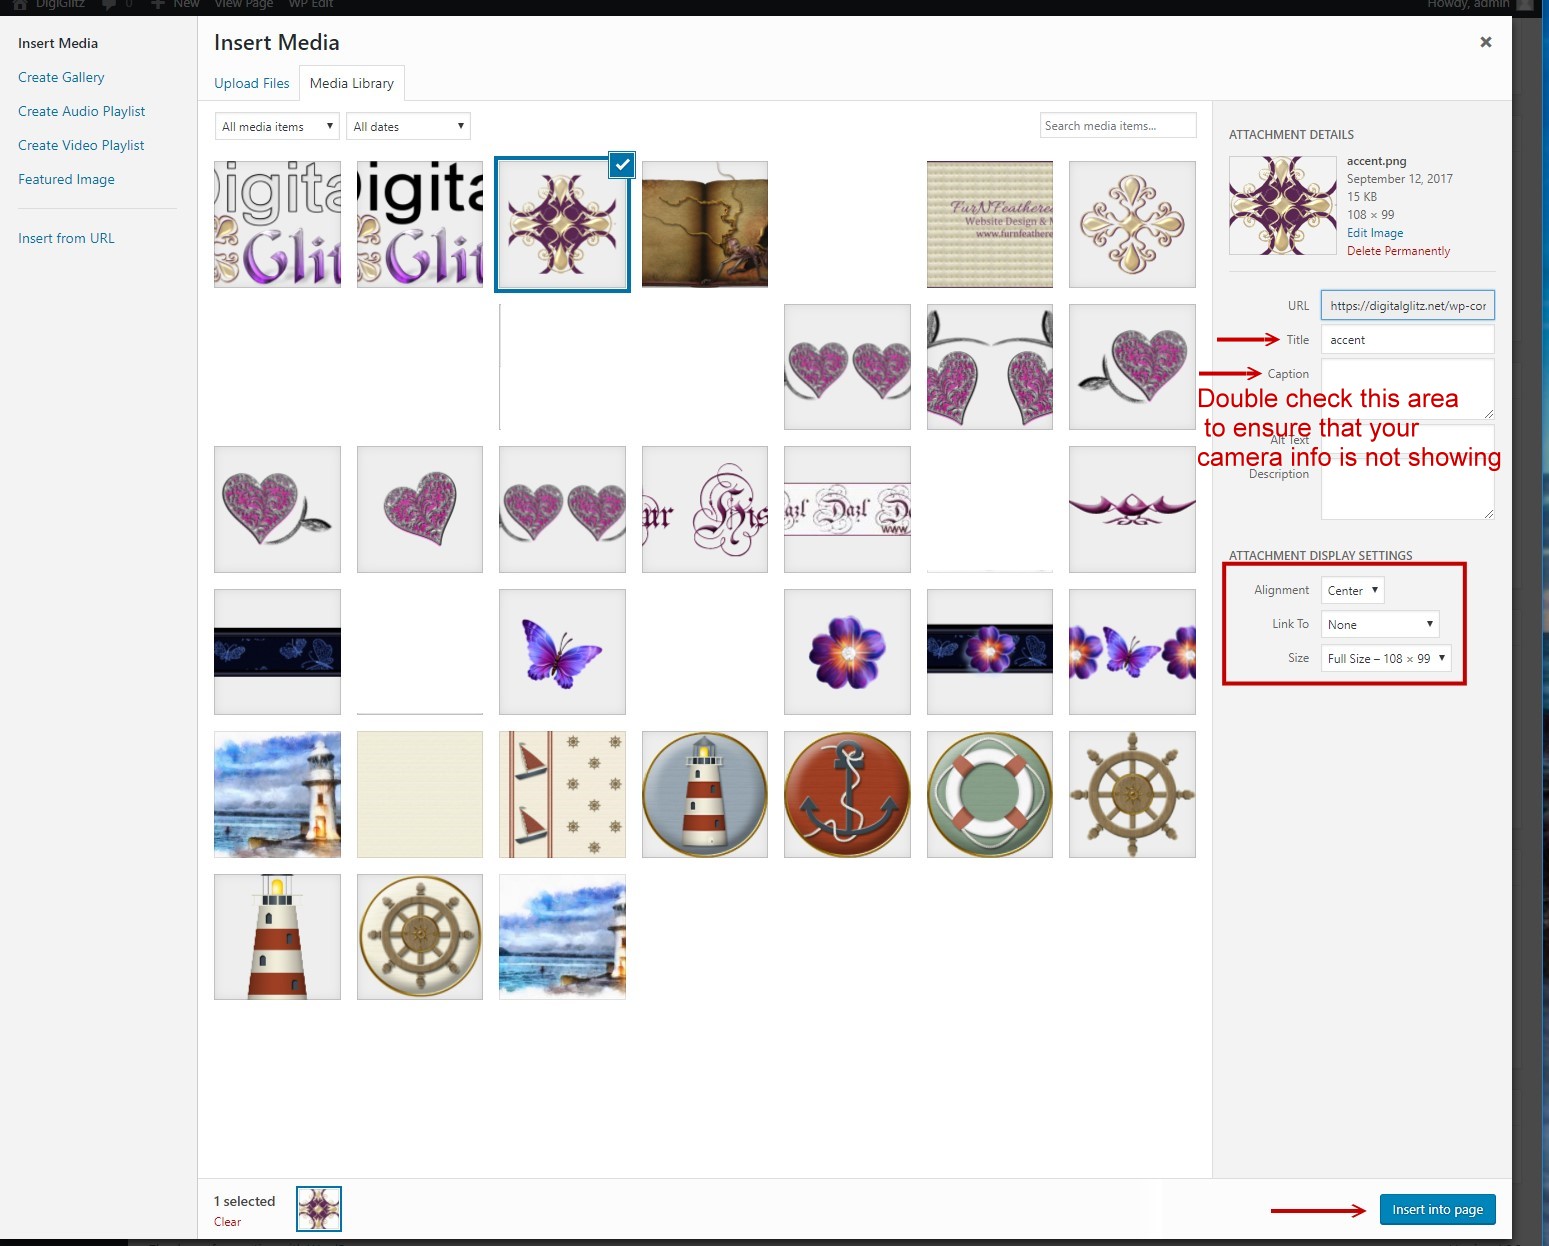
- Select your image.
- If you have not uploaded your image, do so now by selecting the “Upload Files” Tab and either “Drag & Drop” or click on Select Files.
- Your Picture should now have a Check mark in the upper right hand corner of the Thumbnail image.
- Now, click on “Insert into Page” button in the lower right corner.
Remove a Picture/Media
- Click on the Picture
- Click on the ‘X’ in the upper right corner of desired picture
- Your picture is now removed from the page
- Continue with your other edits, if any
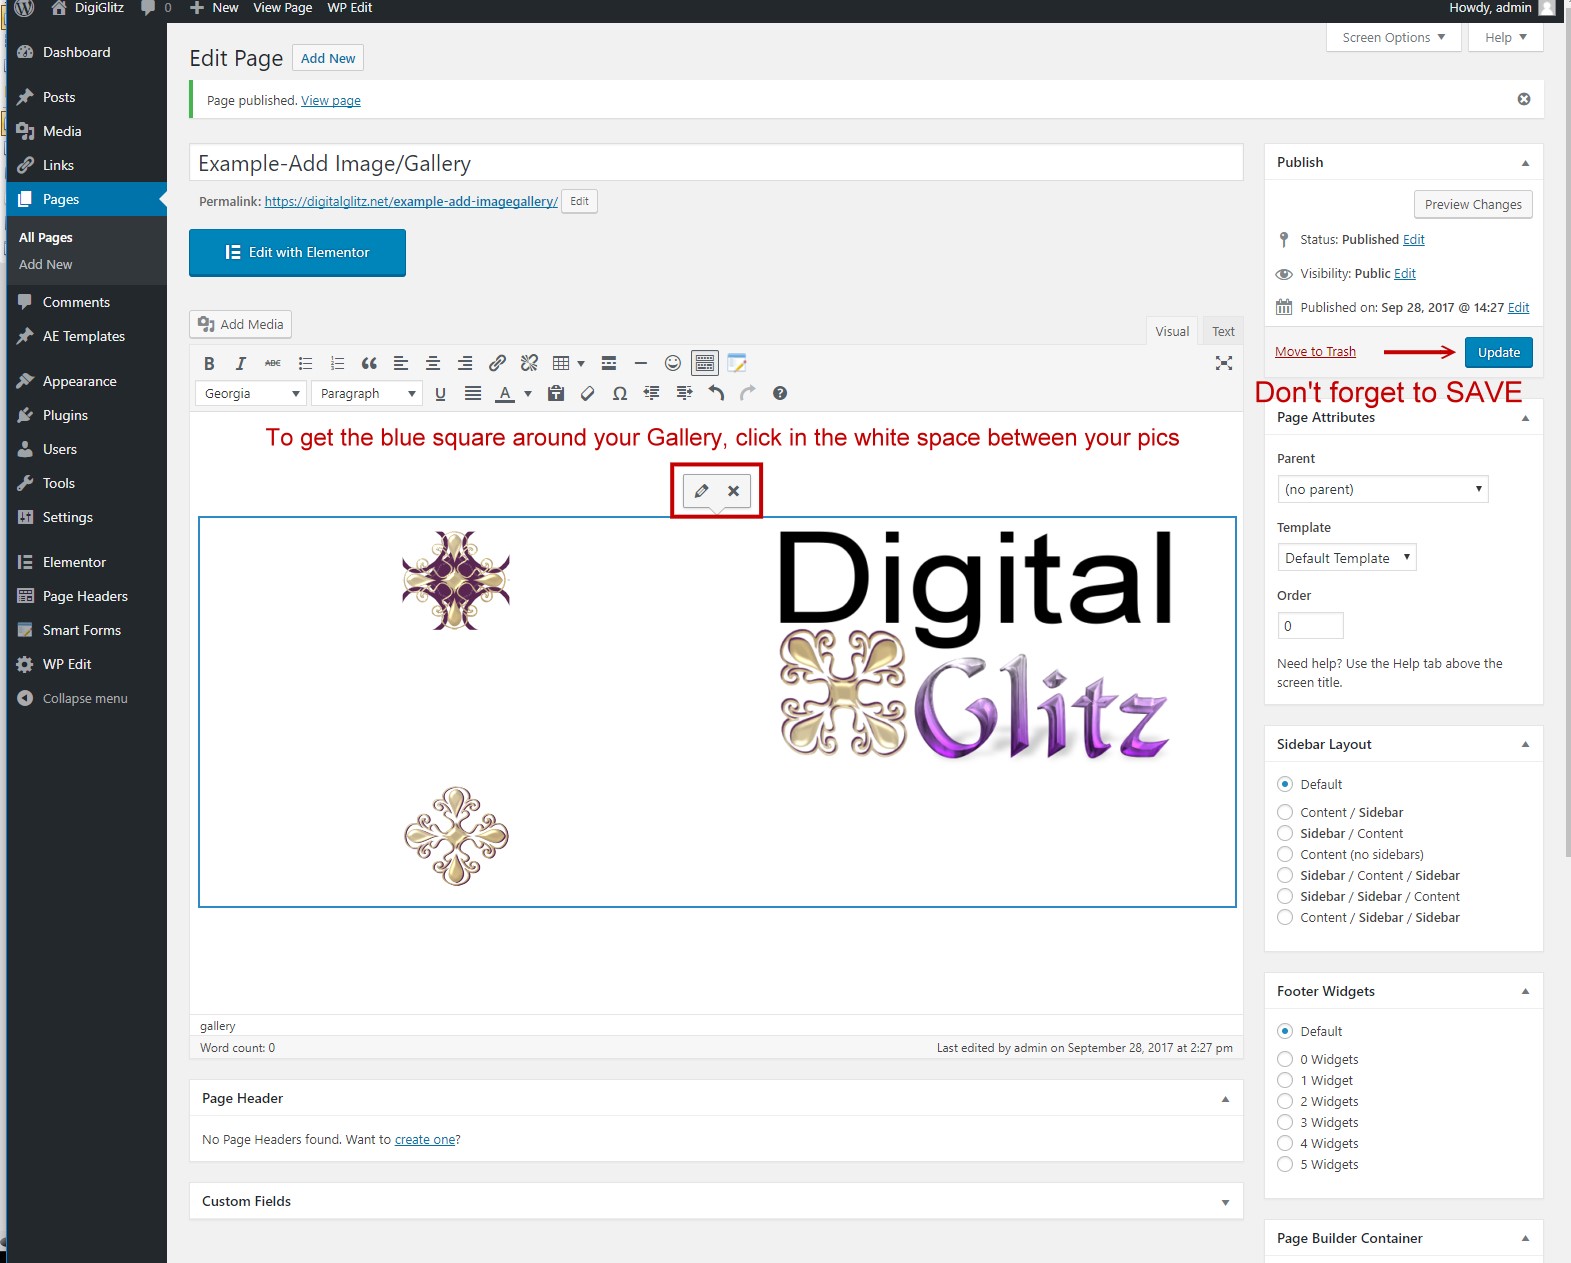
- Don’t forget to SAVE by clicking the Update button upper right side.
Creating a Gallery
Follow steps 1 – 3 Adding new Image
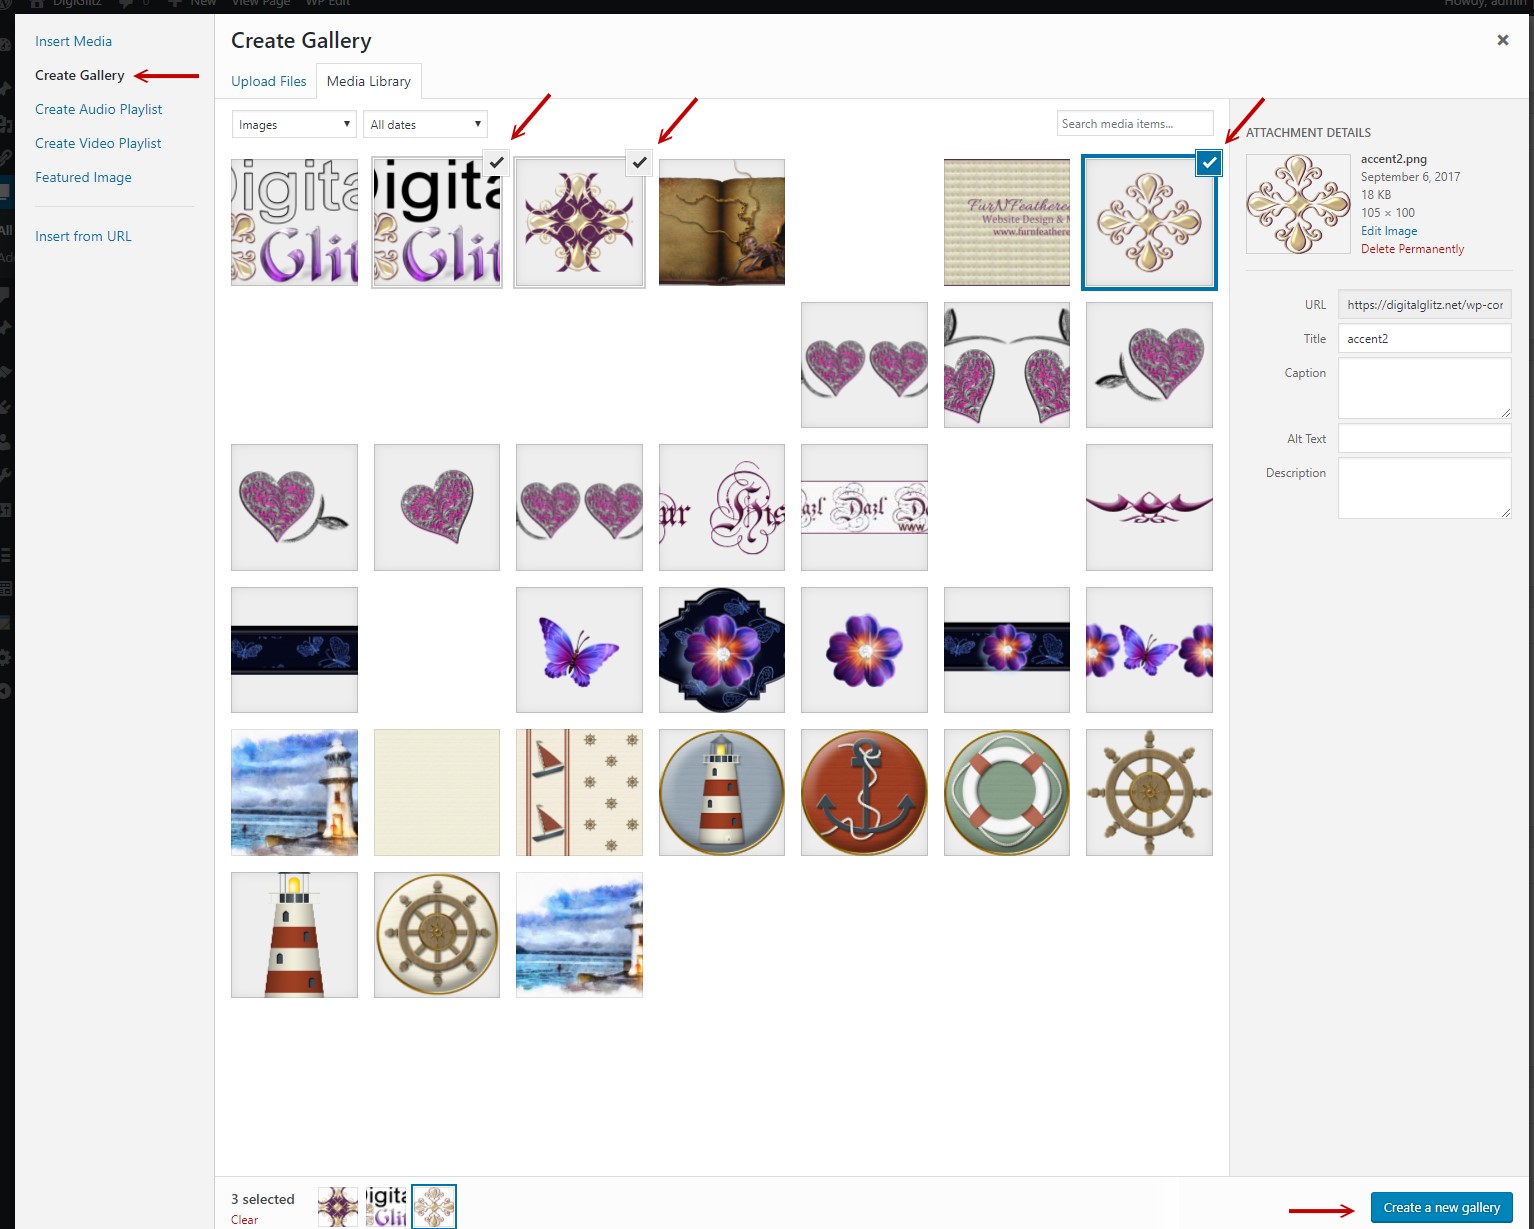
- Select Create Gallery on the Left side of Add Media Library
- Your pictures should be showing, to select a pic that is already there, just click on the picture and ensure it is showing a checkmark in the upper right corner
- To add new pictures that you want in the Gallery
- At the top you should see Create Gallery?, Just below: Upload Files, Stock Photos and Media Library (which is where you should be)
- Click on Upload Files
- Ensure you have the file folder on your computer where you saved your pictures is open, select your pictures and Drag and Drop them
- They will all have a check mark in upper right corner
- To remove a pic If you should choose the wrong pic or change your mind, just click on the checkmark and it will go away.
- Now that you have made your Selections, click on ‘Create a new gallery’ button in lower right corner.
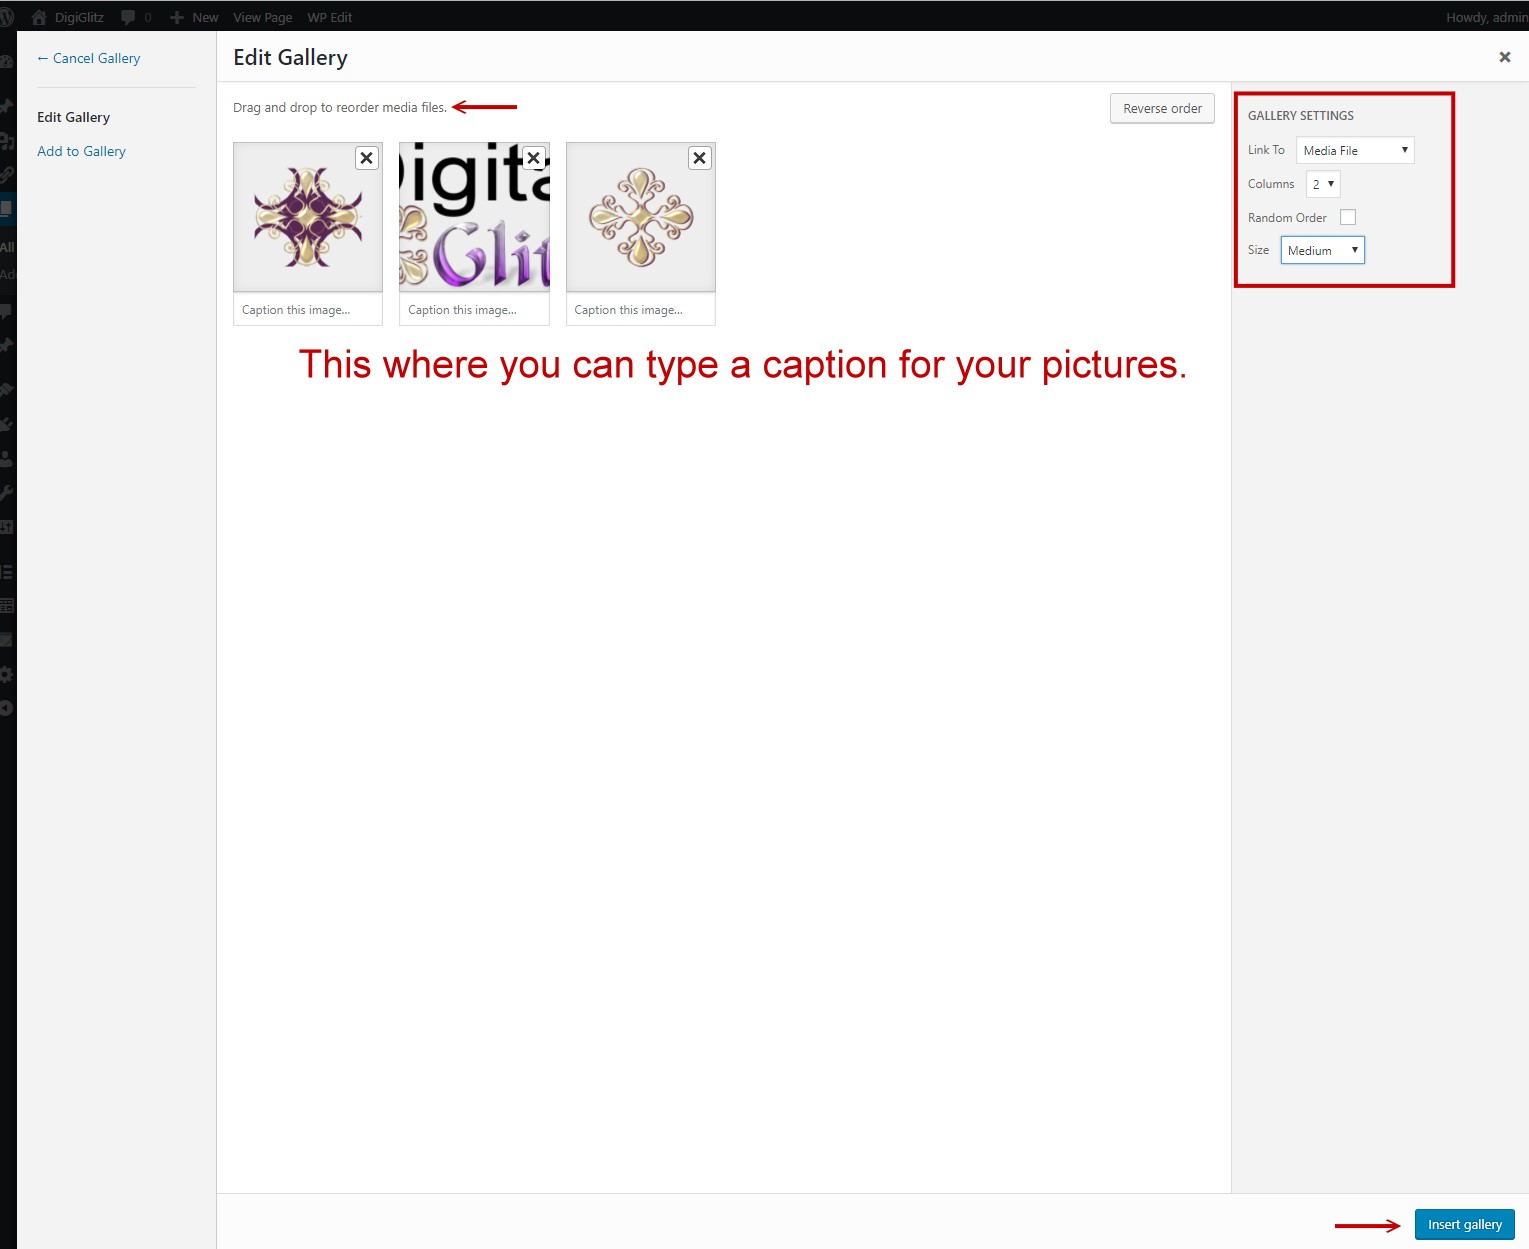
- This screen shows you all pics you selected, you can change position by dragging them where you want, remove pic(click on X)
- In far right column is Gallery Settings:
- Link to: Media or Attachment Page for large pictures
- Columns: Select how many you would like, I recommend no more than 3
- Random Order: leave blank if you have already arranged the order or you can select Random
- Size: Thumbnail or medium for 2 or less columns
- Far right bottom corner, click on Insert gallery button.
- Now Update your page (far right)
Editing Your Gallery
Click on the gallery in the page, a box should surround all pics in gallery and it should be showing a pencil icon and an “X”
Click on the pencil, this brings up your gallery and all pics in it.
To add to the gallery, Far left side, select Add to Gallery:
Choose your pictures or upload new ones
Far bottom right side, click on Add to gallery button
Now Update your page (far right)
TO REMOVE THE WHOLE GALLERY:
Click on the gallery in the page, a box should surround all pics in gallery and it should be showing a pencil icon and an “X”
Select the ‘X’
Gallery should be removed
Now Update your page (far right)